

")
Golden Rules
3 Golden Rules of Stereo Photography
The 3 Golden Rules for stereo photography shall help to use the creative leeway in a good sense, when shooting, mounting or displaying stereo images. A summary of purely technical requirements not within the creative design range of the stereo photographer, but represent a fundamental prerequisite for a fatigue-free enjoyment of stereoscopic presentations, can be found in the DGS quality standard (only German).
What must be considered with stereo photography?
There are exactly 3 basic rules which must be considered, namely one for each of:
The depth information in a stereo image must not exceed certain limits. |
Why should we observe the shooting rule?
Since our brain can process only a limited amount of depth information, the depth contained in a stereo image must be limited so that the entire stereo picture can be observed as a uniform spatial image. A violation of the shooting rule may lead to a decay of the spatial image into individual image sections. If we want a stereo photo that is pleasant to view, adherence to the shooting rule is a condition which should be observed under all circumstances.
Which values and tolerances are dependant upon the shooting rule?
While taking a stereo picture, the spatial depth produces a lateral displacement of the two corresponding points in the left and right stereo images. For close objects this displacement is larger - and it is smaller for distant objects. The difference between the largest (produced by the "closest object") and the smallest (produced by the "most distant object") displacement is called deviation or maximum parallax. The deviation should not exceed 1/30th of the entire image width, which can be detected without twisting the head (for the experts: this value follows from the 70'-condition).
Note 1: If the subject allows it, also the space in front of the stereo window can be used. For these cases the deviation limit is increased with the exact value depending on the subject. For the parts of the image that are in front of the stereo window, an additional deviation up to 1/50 of the image width may be generally well accepted.
Note 2: The restriction on the deviation to 1/30 of the image width always refers to the same detectable image area without twisting the head. For example, if the projected stereo image is so large that it can no longer be perceived at the same time, the maximum deviation value should be reduced accordingly. For cinema projection with very large screens, therefore, a reduced deviation of 1/40 of image width is recommended.
Note 3: For presentations of varying aspect ratios every individual maximum deviation values must be related to the image width of the widest image. For portrait images, this leads usually to significantly higher maximum deviation values.
Note 4: The maximum lateral offset of 1/30 of the image width is to be understood as an upper limit and can, in individual cases even be too large, especially when the nearest point and the farthest point in a stereo image are precisely cutting.
How do I keep the shooting rule?
A simple distance rule to comply the shooting rule is:
| Near point distance > stereo base times focal length (all values using mm). |
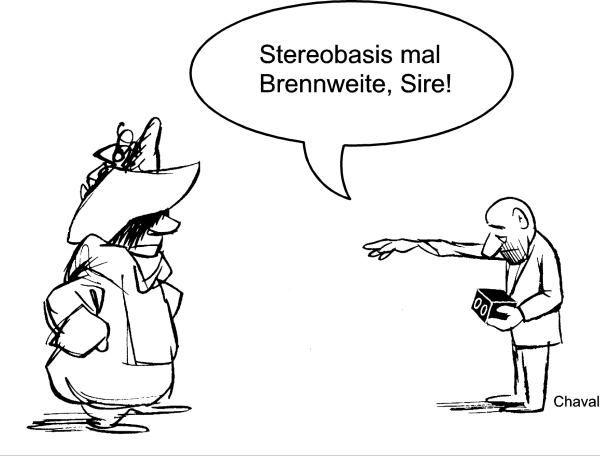
Shooting rule: Beware of insufficient distance!
The near point distance is the distance between the camera and the closest motif point.The stereo base (distance between the lenses) is about 65mm at true stereo cameras. We frequently find - especially in older literature - instead of the focal length of a fixed value, for example, 35 or 50 mm. Since most currently used stereo cameras have zoom lenses with adjustable focal length, these simple rules of thumb are valid only for the corresponding fixed focal lengths. The above mentioned distance condition applies to all motives which includes infinity (e.g. the horizon) as a figurative element.
How do I adhere to the shooting rule?
When taking pictures, you only need to ensure that no object is closer to the camera than the allowable distance to the closest point, calculated using the above rule, for example 2.3m with 35mm focal length, 3.3m with 50mm focal length or 4.5m with 70mm focal length (assuming a stereo base of 65mm). If the far point is not at infinity, the minimum allowed near point distance may be somewhat reduced. In these cases you may evaluate the exact value by applying the DGS Stereo Base Calculator. (All focal length figures are equivalents based on the 35mm picture format.)
Want to know more? Visit one of our regular meetings throughout Germany and discuss with us. Become a member of the DGS!
Photo credits: Edited by Gerhard P. Herbig after Chaval’s Fotoschule, Diogenes Verlag, Zürich.
No part of the spatial image may be cut by the stereo window. |
Why should the mounting rule be adhered to?
With stereo projection (and when looking into a hand-held stereo viewer) the spatial image is usually seen behind an apparent window. This window is called the stereo window. This stereo window is actually the spatial image of the stereo frame. (The left image is the left boundary, the right image is the right boundery.) Whether the image scenery can be seen in front of or behind the stereo window depends entirely on the position of the individual photos with each other.
The stereo window itself can be imagined as a solid wall. When the mounting rule is violated, the spatial image is often too far in front of the stereo window. Parts of the picture seem to penetrate or "impinge on" the wall. This "erroneous image" clearly causes reduced enjoyment when looking at spatial images. However, the mounting rule is a can-rule, i.e. it should be kept, but it doesn't have to be kept under all circumstances.
What limits and tolerances are allowed when applying the mounting rule?
The mounting rule is an aesthetic requirement. Stereo images violating this rule can nevertheless be viewed without fatigue. Adherence to the mounting rule causes the entire picture to be seen behind the stereo window. Commercial 3-D movies usually concentrate on spectacular effects rather than aesthetics, therefore violations of the mounting rule are most often found here, as the spatial image is set deliberately in front of the stereo window.
Only objects completely set within the frame and usually located in the foreground part of the scenery - for example, a shot of an elephant's trunk taken frontally - may "violate" the mounting rule and can be set in front of the stereo window (i.e. the trunk is seen coming out of the stereo window). More equally popular examples are: The pump lever over the well whose water stream splashes the audience, the animal stretching its head through the stereo window, the bird or the insect flying in front of the stereo window and others.
How do I avoid breaking the mounting rule?
If you cut the left image on the left side and the right image on the right side,(slides are drawn apart relative to the slide frames), the entire space shifts backwards, in the opposite case forwards. With digital stereo images, the positionof the stereo window usually will be positioned with a mounting software either manually or fully automatically. The optimal window position is achieved, when the spatial image is as far forward as possible, but as far back as necessary according to the mounting rule. Then the nearest point just touches the stereo window. The spatial scenery starts directly behind the window and no space between the stereo window and the near point is wasted. (This type of mounting is often called "near point mounting".) Remember - violations of the mounting rule cannot be corrected during projection.
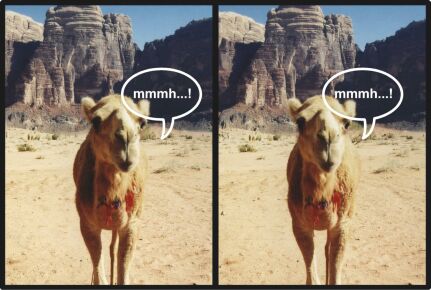 Mounting rule: Mount only freestanding parts of the picture in front of the window!
Note:For 3D video with frequently changing motifs and scenes, near point framing can lead to an undesirable disturbance at the far point, in the worst case the farthest point jumps from scene to scene forth and back. To avoid this, notwithstanding the recommendationformulated above, the farthest point will be assigned constant disparity, for example, 1/30 or 1/40 of the picture width. This form of image mounting is called far point mounting. Using this kind of framing, the mounting rule is fullfilled automatically (no stereo window violation!), if the shooting rule was met. For problematic images with a bit too much depth floating stereo windows within the image may help.
Want to know more? Visit one of our regular meetings throughout Germany and discuss with us. Become a member of the DGS!
Photo credits: ©Gerhard P. Herbig
No person viewing a stereo image should be forced to diverge his eyes. |
Why should the projection rule be adhered to?
When looking in the distance the viewing axes of the eyes are parallel, whereas looking at near objects the eyes converge inwards a bit. With natural vision, diverging viewing axes never occur.
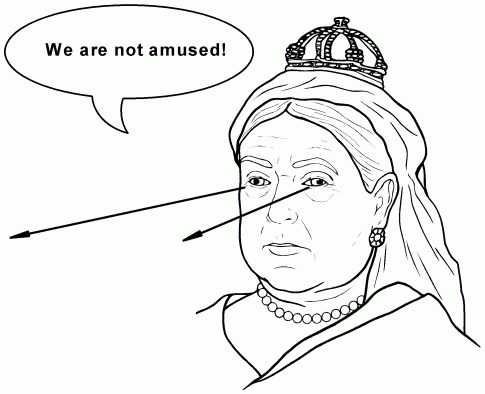
Playback Rule: Avoid divergent viewing axes!
If forced to look at stereo images using diverging viewing axes for a longer time, pounding headaches are the inevitable result. Even if some people are capable of fairly amazing eye gymnastics, looking at stereo image should be enjoyable for every viewer. Therefore the projection rule has to be enforced under all circumstances in any stereo projection.
What limits and tolerances are allowed in stereo projection?
When distant objects are looked at, the viewing axes are parallel. If such distant objects are projected in stereo, a background screen separation of about 65-70mm equates to natural vision. Small increases are permitted. They should, however, not be more than 10mm for each 1m projection distance (resulting in an excess of 50mm over a 5m distance, 100mm over 10m distance and so on). The comfort of those in the audience seated closest to the screen must be considered. (For the experts: Technical literature indicates an angle of 1º is the maximum admissible divergence. However, it is the author's experience that many spectators suffer definite eye fatigue symptoms at this divergence!).
How do I adhere to the projection rule?
If the shooting and the mounting rule have been faithfully adhered to, not violating the projection rule is child's play. A stereo slide containing the infinity point is projected. The projectors moved sideways the two on the screen (possibly plus additional tolerance value) of 65mm With this methodology the stereo window can quite easily appear to be located in front of the screen!
Only when projecting at home, with limited projection enlargement and for the sake of simplicity, may the stereo window be put exactly at the level of the projection screen. For projections in larger halls this procedure is not recommended, because 3-D viewing of nearby objects is much more enjoyable than of objects far away.
Want to know more? Visit one of our regular meetings throughout Germany and discuss with us. Become a member of the DGS!
Photo credits: Edited by Gerhard P. Herbig
For optimal stereo enjoyment, the application of all 3 basic rules is absolutely necessary. The rules are comprehensive: all further stereo laws, requirements and rules can be derived from these 3 basic rules.
Note: Frequently the question is asked, why, for example, the so important demand "there must be no height error in a stereo image!" is not part of these 3 Golden Rules. Answer: The 3 Golden Rules deal solely with the creative room for maneuver of the stereo photographer. Concerning the adjustment of the height errors a stereo photographer has no choice: they are simply to be eliminated! For details on the purely technical requirements please refer to the DGS-quality standard.
Want to know more? Visit one of our regular meetings throughout Germany and discuss with us. Become a member of the DGS!
The "Golden Rules" have been phrased by Gerhard P. Herbig. Reproduction on these pages is carried out with kind permission of the author.